How to Install a Vitextra Product in SharePoint Online
Introduction
In today's digital landscape, enhancing your SharePoint Online environment with custom solutions can significantly improve productivity and user experience.
Vitextra offers a range of SPFx-based products designed to extend the functionality of SharePoint and Microsoft Teams.
This article provides a step-by-step guide on how to install a Vitextra product in your SharePoint Online environment, ensuring you have the necessary prerequisites and permissions for a smooth installation process.
Preconditions
Environment
Vitextra SPFx-based products may be installed only on Microsoft 365 (SharePoint Online, Microsoft Teams).
❗ Important
Vitextra SPFx products can not be installed on SharePoint on-premise 2016/2019.
Required Permissions
Tenant Admin Access
You must have the SharePoint Administrator role in your Microsoft 365 tenant. This role grants you the authority to manage the App Catalog and install apps across the SharePoint Online environment.
App Catalog Permissions
Within the App Catalog site, you need to have Full Control permissions. This allows you to upload, manage, and delete apps, including SPFx packages.
User Permissions for End Users
While not directly related to installation, ensure that users who will be using the SPFx web parts have the necessary permissions to access the site and its content. This typically includes at least Read permissions on the site where the web part will be deployed.
Installation package
First, you need to download the Smart Tiles package. You can obtain it from the Vitextra Download Center or Microsoft AppSource.
💡 Tip
The Download Center often provides the latest updates and features more quickly than AppSource.
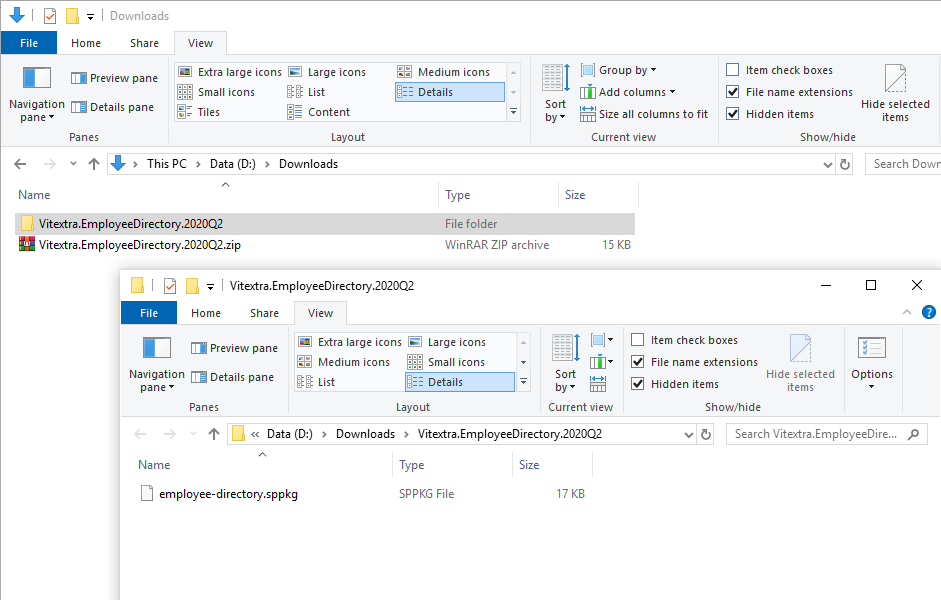
Download the zip file (*.zip) of the product and unpack it to somewhere on your computer.
Installation
Step-by-Step Instructions:
1. From Microsoft 365 admin center navigate to SharePoint Admin Center.
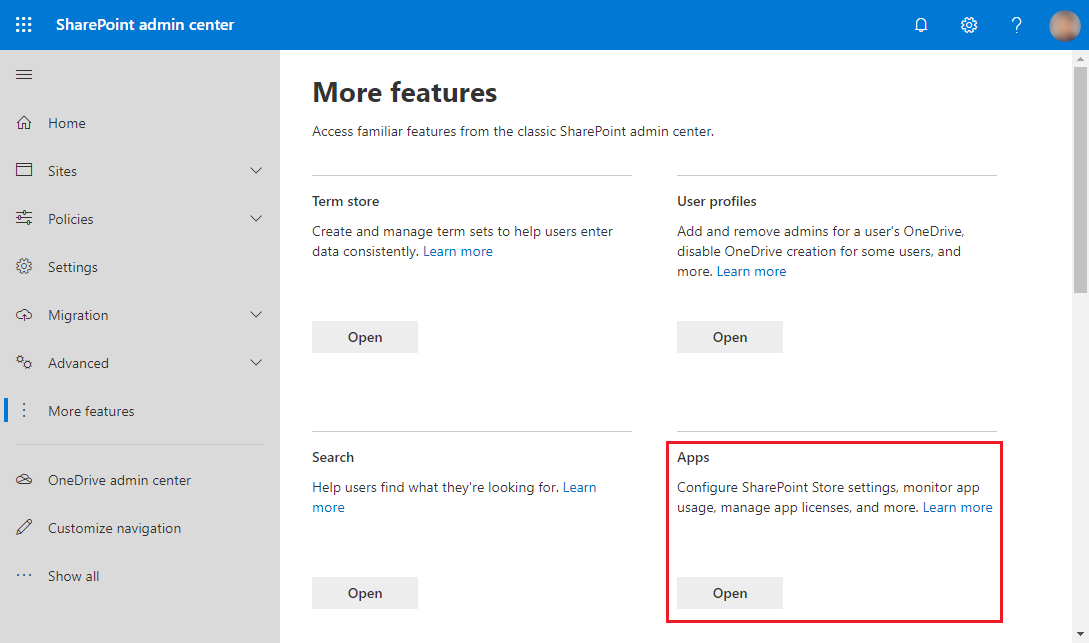
2. Go to More Features and click the Open button under the Apps heading:
3. Click on App Catalog to manage your SharePoint applications.
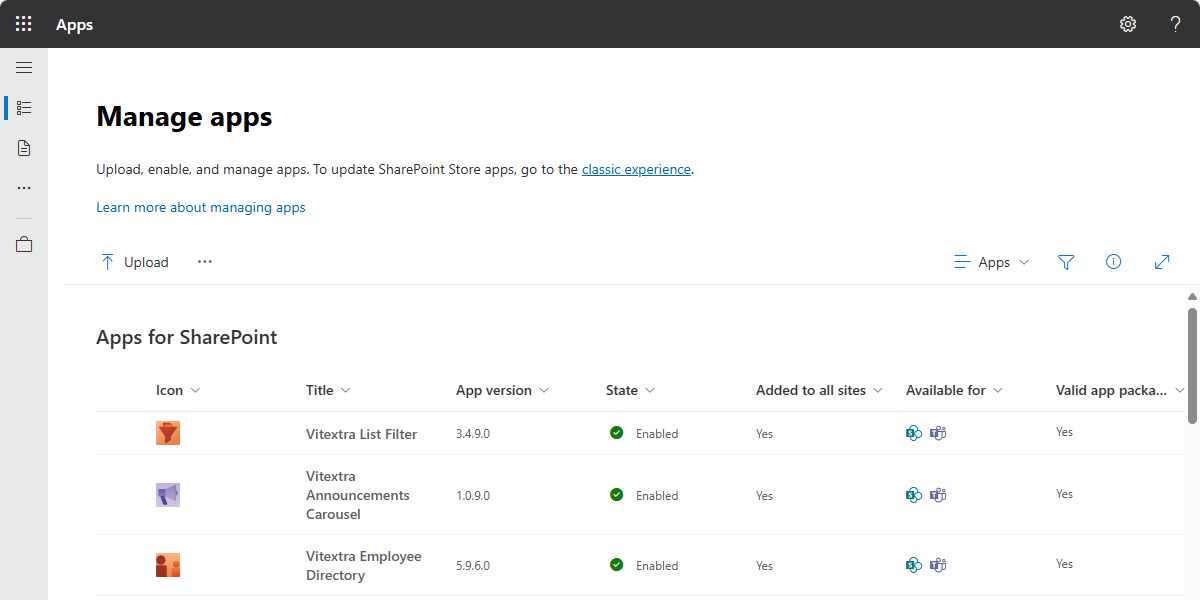
4. Click on the Upload button and select the extracted .sppkg file.
❗ Important
Make sure to extract the .zip archive before uploading. You must upload the extracted .sppkg file, not the .zip file itself.
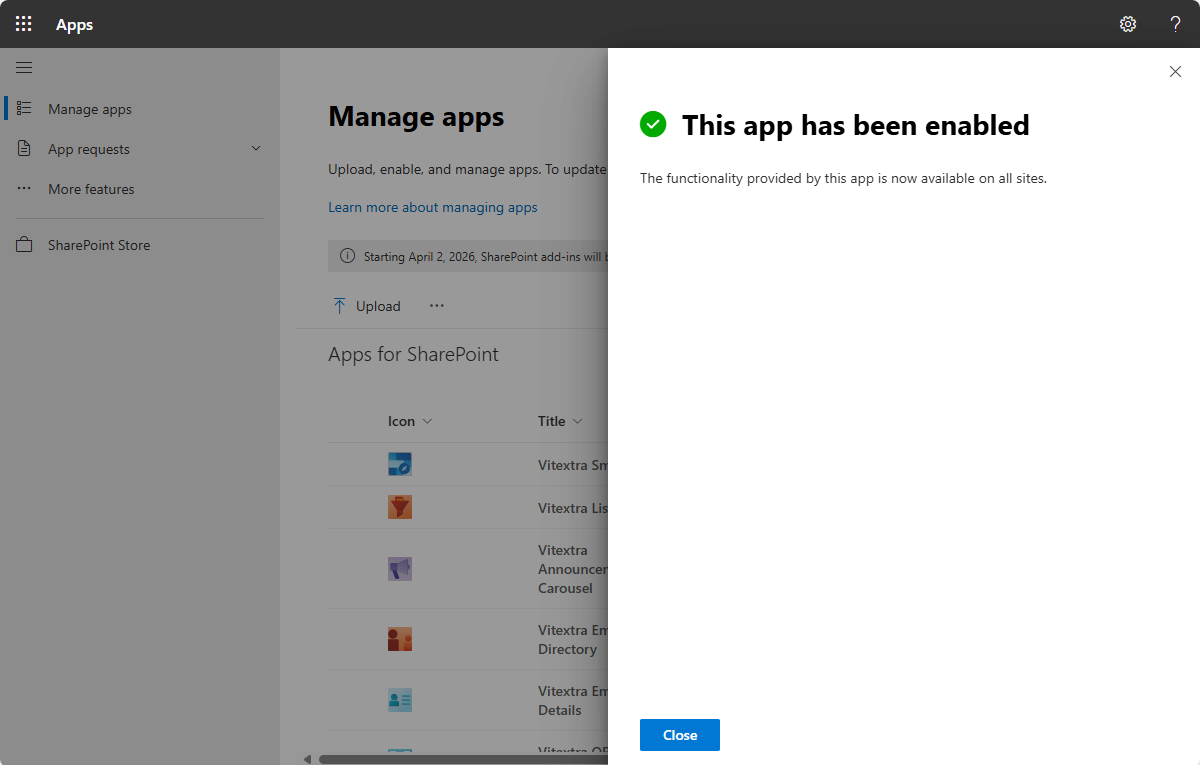
5. After uploading the package, SharePoint Online will prompt you to trust the solution. This is a security measure to ensure that the app meets your organization’s compliance standards. Click install to confirm the installtion.
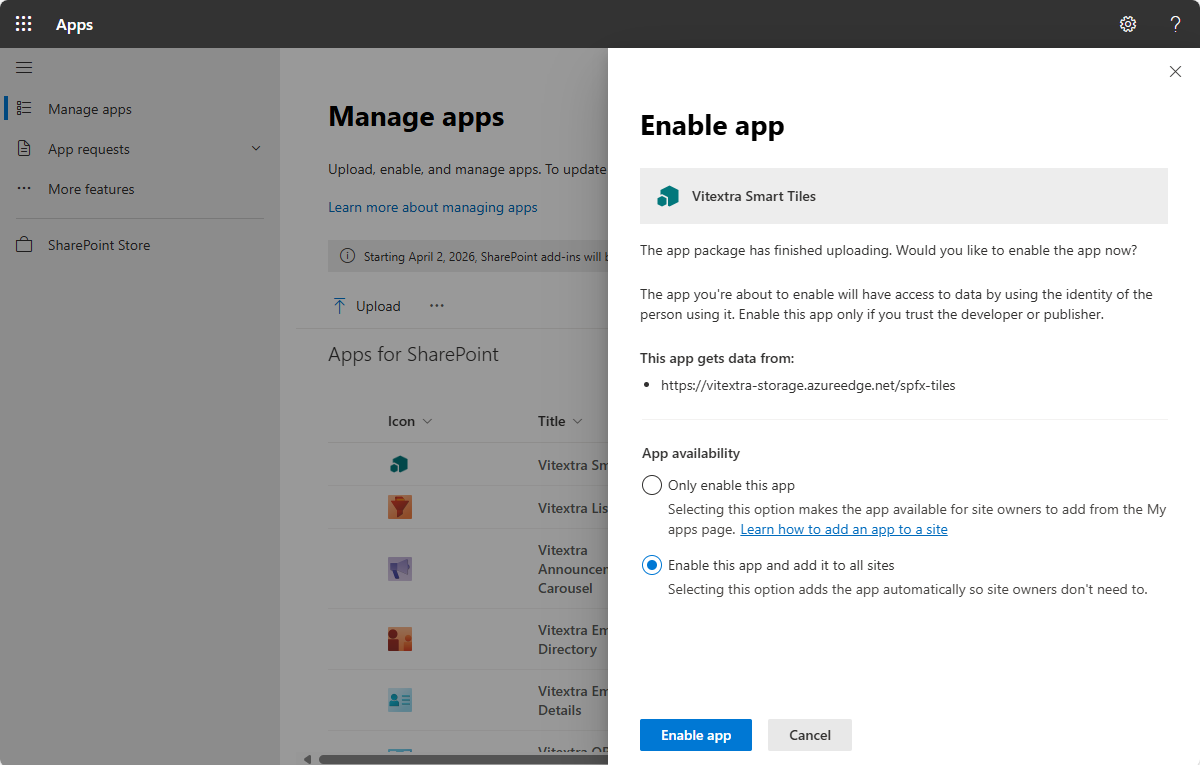
6. Once the package is deployed, it will appear in the list of installed client-side packages, confirming that the installation was successful.
API Access
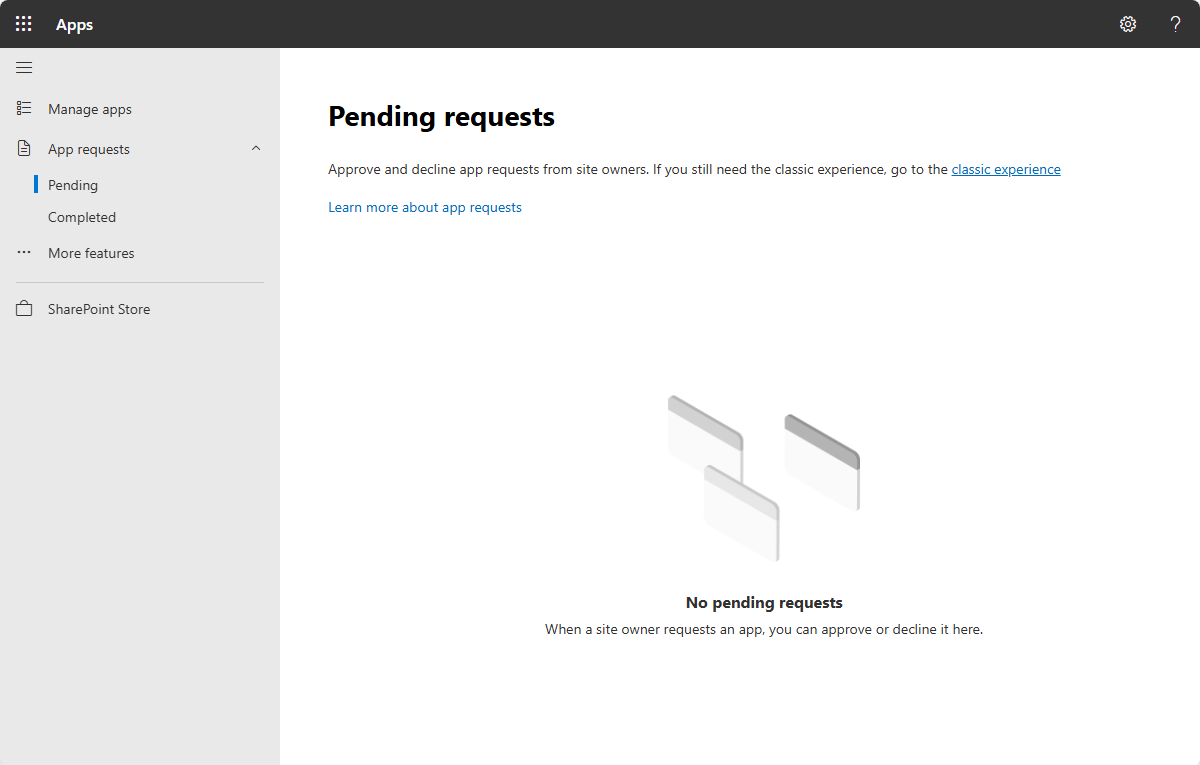
To ensure the installed application has the necessary permissions to access the API, go to the Pending under App Requests heading in the left navigation menu.
Here, you can approve any API access requests that may have been generated during the installation process.
Summary
In summary, installing a Vitextra product in SharePoint Online involves several key steps: ensuring you have the right environment and permissions, downloading and uploading the installation package, and managing API access.
By following these steps, you can successfully integrate Vitextra solutions into your SharePoint environment, enhancing its functionality and user experience.