How to Add and Configure the Vitextra Employee Directory Web Part
This guide will walk you through each step to enhance your SharePoint site with a powerful tool that improves communication and collaboration within your organization. From adding the web part to customizing its layout and configuring filters, you'll learn how to make the most of the Employee Directory.
1. Add the Employee Directory Web Part
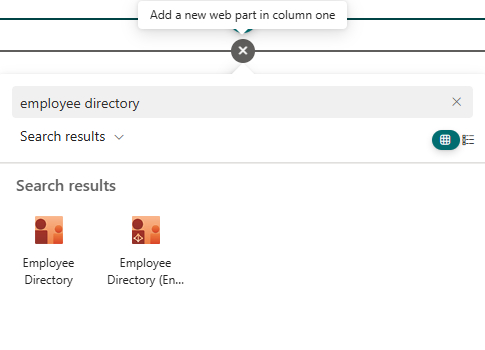
Add the Employee Directory Web Part Navigate to the SharePoint page where you want to add the Employee Directory. Click on 'Edit' at the top right corner of the page. Click on the '+' icon to add a new web part. In the search box, type 'Employee Directory' and select the Employee Directory web part from the list.
📝 Note
The Employee Directory web part can use either SharePoint User Profiles or Entra ID as its data source.The other option, Employee Directory (Entra ID), only supports Entra ID, but it offers more features for filtering and displaying data.
2. Configure the Web Part
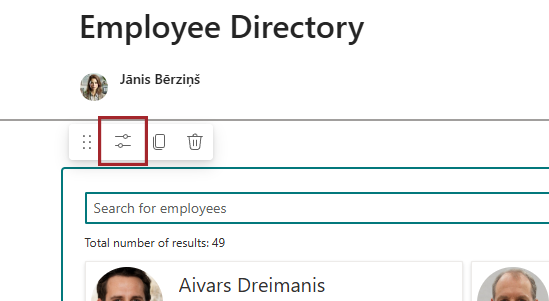
Configure the Web Part Click on the edit properties icon to open the configuration panel and customize various settings to tailor the directory to your needs.
3. Configure Columns
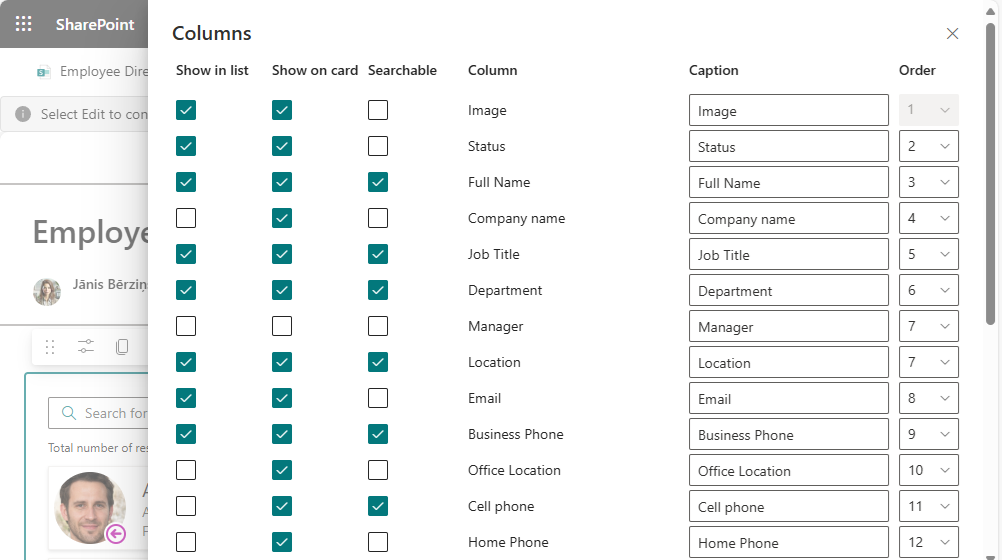
Configure Columns Add, remove, or reorder columns to display the information that's most relevant to your organization. Include columns for name, job title, department, and contact information. Mark columns as searchable and change the caption of each column to better suit your needs.
4. Customize the Layout
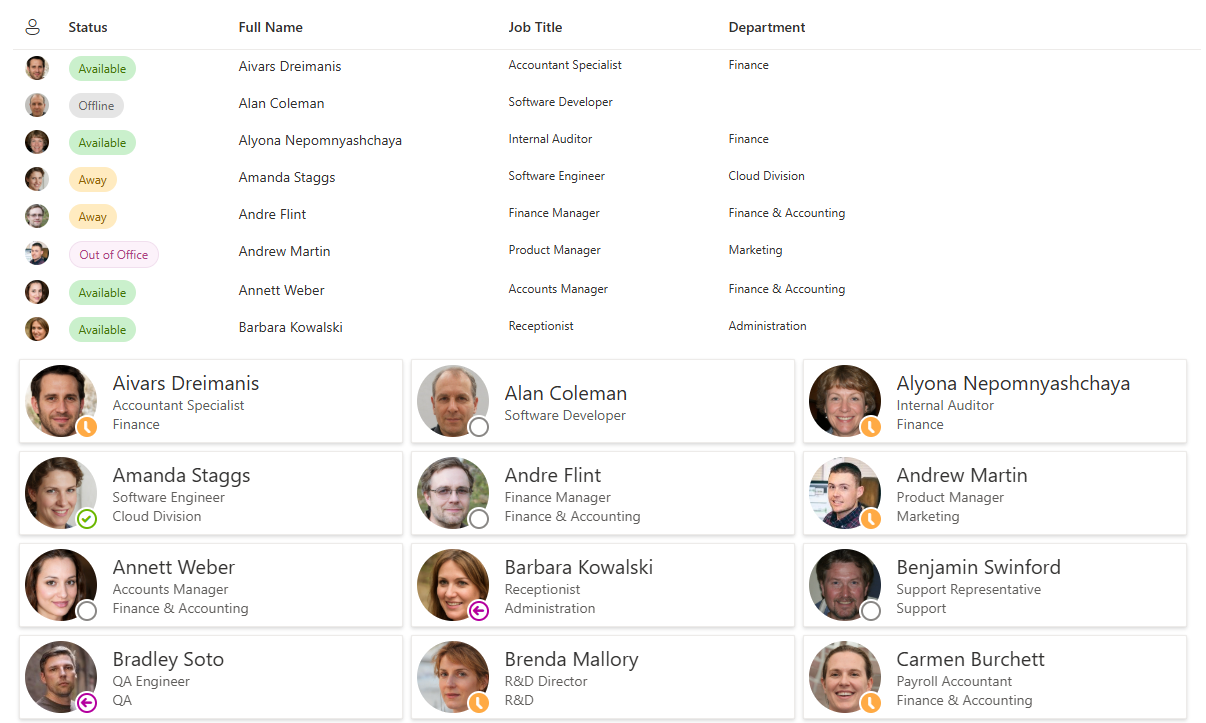
Customize the Layout Choose between two versatile layout options: Details and Cards view. The Details layout presents search results in a tabular format, allowing users to reorder columns using the app settings. This layout is ideal for a detailed and organized view of employee records.
The Cards layout displays search results using the native SharePoint control, presenting employee information in an aesthetically pleasing card format. This option is suitable for users who prefer a more graphical and simplified interface.
5. Configure Filters
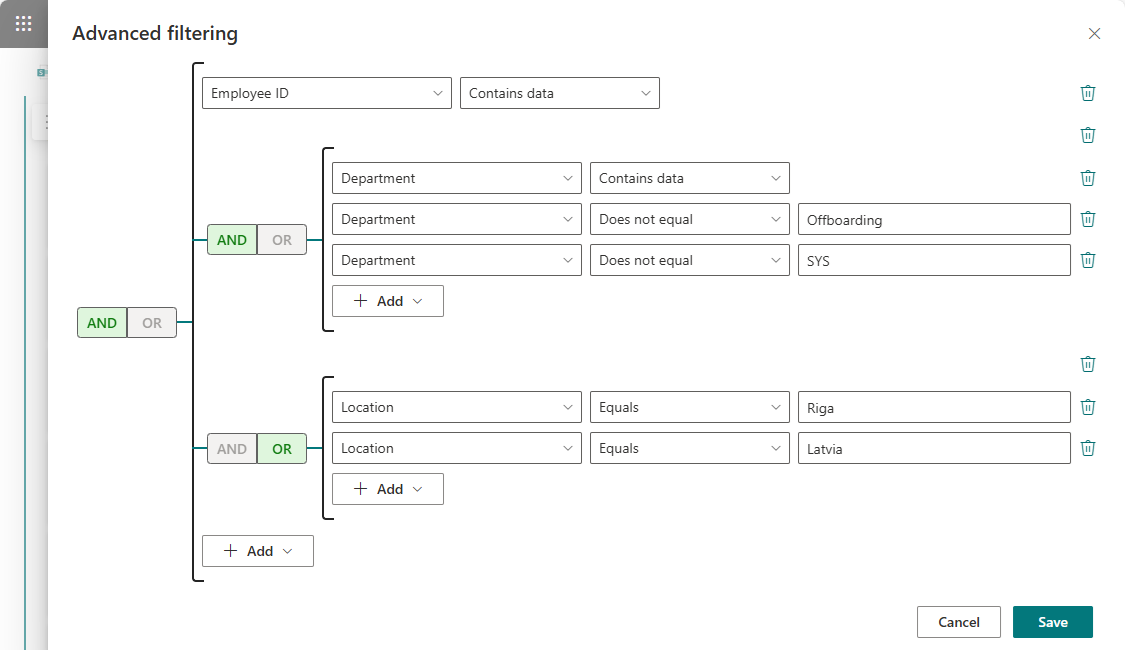
Configure Filters Use the Query Builder to create complex filters. Define specific criteria to narrow down the search results, such as department, job title, or location.
6. Set Up the Refinement Panel
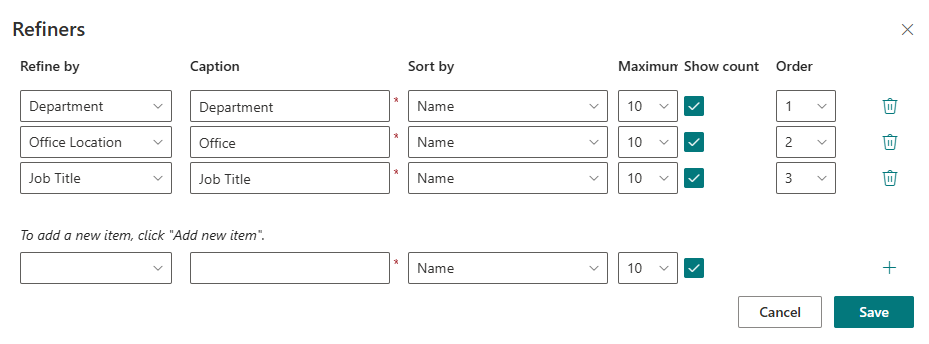
Set Up the Refinement Panel Configure the refinement panel to include various refiners such as department, job title, or location. Use the panel to dynamically filter search results by selecting the desired criteria.
7. Add the Web Part to a Full-Width Section
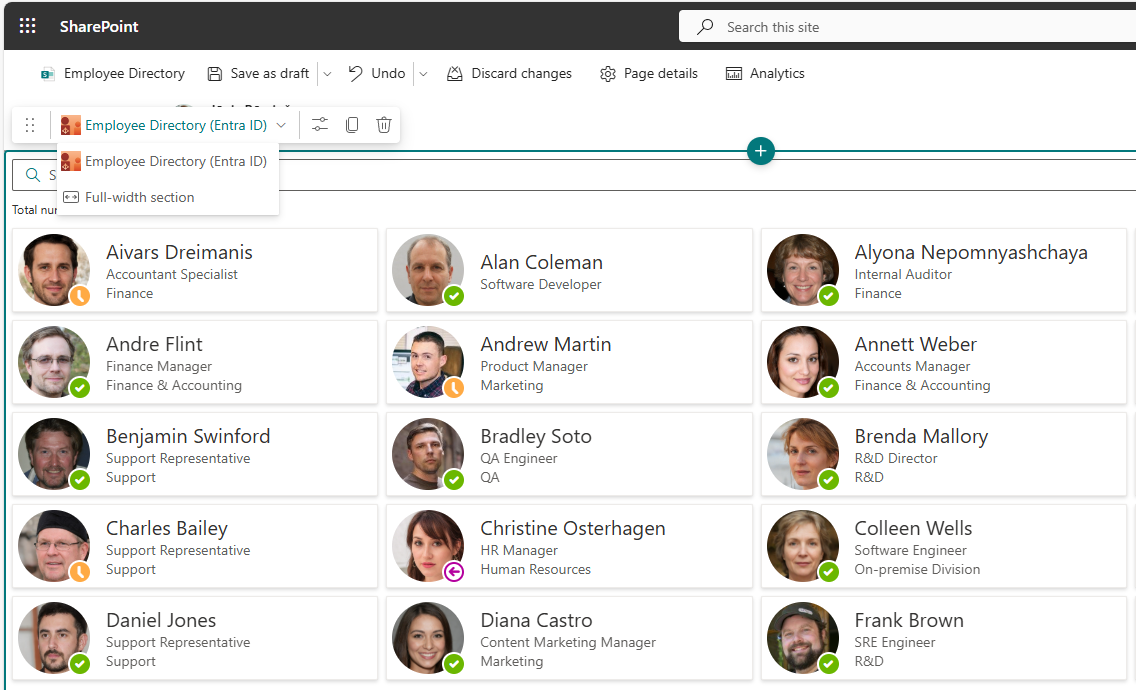
Add the Web Part to a Full-Width Section Move the web part from a general section to a full-width section. Drag and drop the Employee Directory web part into the full-width section to enhance the visual appeal and usability of the directory.
8. Explore Additional Features
The Vitextra Employee Directory solution includes three web parts: Employee Directory, Employee Directory (Entra ID), and New Employees. Each web part serves a unique purpose and can be configured to meet your organization's specific needs.
For more detailed information, refer to the KB article:
How to
Step-by-step guides